Sourdough Starter Trouble Shooting
I can’t keep plants alive. It took me four years of trying before I finally got any sort of tomato to grow on my patio. I’ve even been known to kill cacti and succulents, no matter how low maintenance. But yeast? That one I’ve conquered how to take care of. Jury’s still out, but I seem to be good at nurturing humans so far too.
Before we get any further into this, let’s establish one thing right now- do not, I repeat do NOT ever buy a sourdough starter online. Borrow from a friend, absolutely, but don’t fall for one of the ‘buy online’ gimics. You’re better than that! If you are savvy enough in the kitchen to explore baking your own bread, you can make a starter from scratch. Now that we have that out of the way, let’s talk about yeast.

Commercial yeast is what most people today are familiar baking with and it comes in two forms- active dry and instant. These are both Saccharomyces Cerevisiae, a species of yeast that we have figured out how to harness and commoditize in the modern world. Fun yeast fact- active dry yeast and instant yeast can be used totally interchangeably. The only difference is how you incorporate the yeast in the final recipe- for Active Dry you would first hydrate it in the liquid ingredients whereas Instant Yeast can be tossed right in with the dries. Fresh yeast is a third type sold commercially, but much less common.
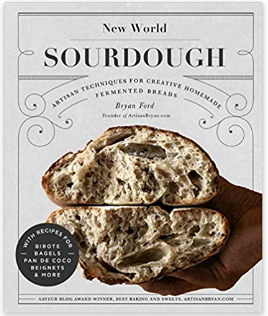
Before you were able to purchase yeast in a grocery store, bakers relied on wild yeast and fermentation to leaven their creations. The same species of Saccharomyces Cerevisiae is also present in everything from flour to the skin of grapes to the air we’re all breathing. With the right mix of food and hydration, you can capture the yeast you need to create a puffy loaf of bread right before your very eyes. In modern baking, we call this a sourdough culture, and most people would attribute it to a loaf of bread. But you can use sourdough in a variety of baked goods- both savory and sweet- if you have enough patience. My current favorite sourdough cookbook is by Bryan Ford and you can check it out here.
To begin your own starter, simply mix equal parts flour and water. There are a lot of tips and tricks out there, but for me, I enjoy following an exact recipe and weighing ingredients. It might totally work for you to eyeball it and mix a non-discriminant amount of flour with water. I prefer to remove that room for error. These are basic amounts to get it going, knowing that you may need to end up with more or less for a bread recipe. The important thing is that the ratio stay the same:
2oz flour
2oz warm water
Mix it in a glass or plastic container (that can hold at least twice the volume of your mixture), and leave it out at room temperature for 24 hours. That’s it, that’s day 1. On day two, around the same time of day, measure out this into a new container:
2oz from day 1 mixture (starter)
2oz warm water
2 oz flour
Again, the important thing is that you keep equal parts starter, water and flour. Stir and make sure all of the flour bits are hydrated, and leave it out at room temperature for another 24 hours. Repeat each day for 7 days, discarding the extra 4oz of starter left over from the previous day. If this waste bothers you, you can decrease all of the amounts to be 1oz or even 0.5 oz. You don’t need a lot in the beginning! I wouldn’t recommend you use the discard in recipes quite yet, but that will eventually be an option so don’t fret.

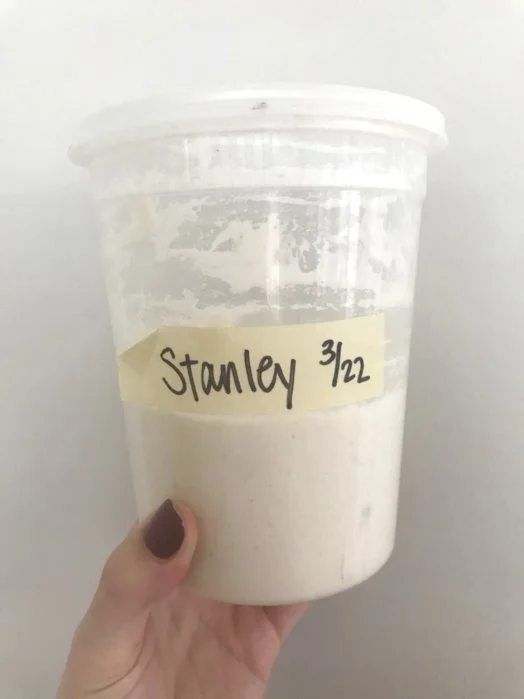
On day 7- follow your recipe for making sure you feed the starter enough to allow for what is needed to bake and to have some leftover to continue the culture. Why 7 days? This timeframe allows your starter to mature and ferment. Each day, you’re building onto the next and adding to your growing colony of yeast without quadrupling the total amount of starter. By day 3 or 4, you should have visible activity in your container that may just be tiny bubbles, or it may be the mixture doubling in volume throughout the course of the day. The tape on this container shows the level when it was fed, and this picture was taken about 3 hours after feeding:

It sounds simple, right? It is, but a lot could still go wrong. The starter/sourdough process is heavily dependent on your environment. Success comes from figuring out what works best for what you’re working with and that can be frustrating. Here’s some troubleshooting ideas:
What to do if my starter doesn’t bubble or grow?
Leave the lid of your container cracked open. The improved airflow will help you collect more wild yeast.
Use warm water (like 85-90*F)
Use tap water - not filtered or bottled water
Try a different type of flour (see flour pros and cons below)
Make sure your container is clean and non-reactive (plastic or glass)
What type of flour to use in a Sourdough Starter?
Bread flour- generally the most expensive type of wheat flour; protein levels tend to vary by brand and while you will likely need this flour for your end loaf, it might not be the most consistent food for your yeast.
All-Purpose flour - the most commercially consistent wheat flour and my choice for feeding a starter
Rye flour - harder to source for the home baker (try here or here!) but a good boost of food for yeast to jumpstart activity if you’re having trouble. If you’re using your starter for bread, I’d especially recommend trying this one.
What if my final bread is flat/dense? Is my starter dead?
Short answer: no. But it might need some work! This could be due to the final recipe you’re following, but most likely it has to do with when you are last feeding the starter before you’re using it. If you don’t see a jump in activity an hour or two after feeding your starter, it is not ready to be used in recipes. Rehab it by feeding twice a day for two days, or until you see the level rise and recede before trying again.
How to store my starter long term/Is this forever?
If actively using for baking, starters should be kept at room temperature and fed at minimum every 24 hours. Directly following a feeding, you can “pause” it by storing in the refrigerator.
A starter can be stored in the refrigerator indefinitely, but don’t be surprised if a liquid forms on the top. This is called ‘hooch’ and can get pretty gross the longer you let your starter sit without a feeding. The darker the liquid, the hungrier your yeast. For pro-longed storage, I suggest giving the refrigerated starter a feed whenever the liquid on top starts darkening.
If storing your starter in the refrigerator, take it out and complete two feeds ahead of using it for baking, maybe more. If you don’t see your starter grow and recede before baking, it’s not ready to use.
I’ve also heard of dehydrating your starter or freezing chips of it. I haven’t tried either of these but these are some sourdough resources I’ve found helpful that talk about those:
@truesourdough
@kingarthurflour
@madewithsourdough